SentinelOne FAQ: Common Questions
Get the answers on several common questions about SentinelOne
- Completing the Installation on macOS
- Uninstalling SentinelOne Agent from SentinelOne Management Console
- Uninstalling SentinelOne Agent from Endpoint
- Uninstalling from macOS
- Uninstalling SentinelOne with macOS Recovery Mode
- Uninstall SentinelOne from macOS Command Line Using sentinelctl
- Uninstalling SentinelOne from Windows
- Uninstalling SentinelOne from Linux
- macOS End of Life Agents
Completing the Installation on macOS
macOS is special when it comes to endpoint installation, and it’s highly dependent on the version of macOS you are installing on.
For users of macOS Catalina(10.15), Big Sur(11), Monterey(12) and Ventura (13)…
After SentinelOne has been installed on your computer, you will see this new icon in the computer’s menu bar at the top of the screen, and it may have a yellow dot, or the icon may be grayed out.
![]()
If this new icon has a yellow dot, and you click on it, you will see this:

To finalize the installation of SentinelOne…
-
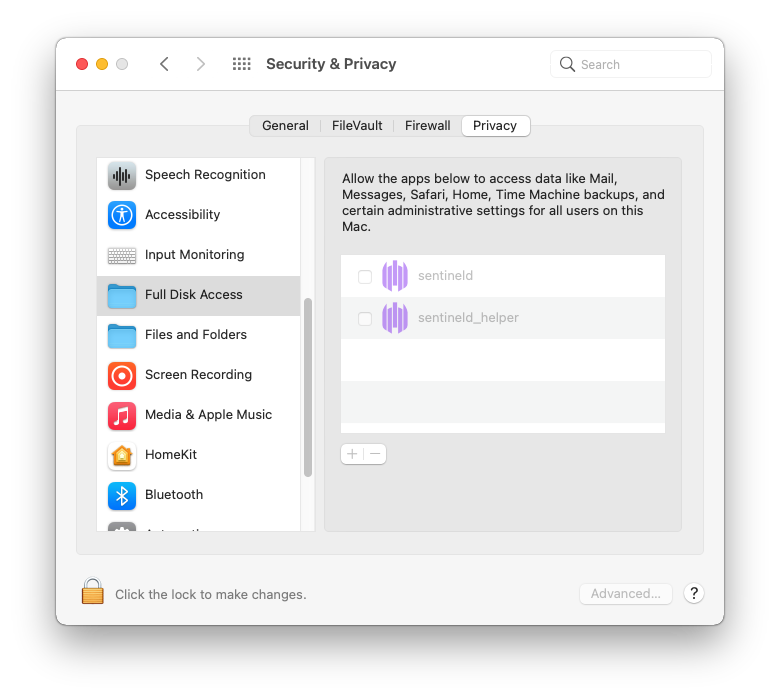
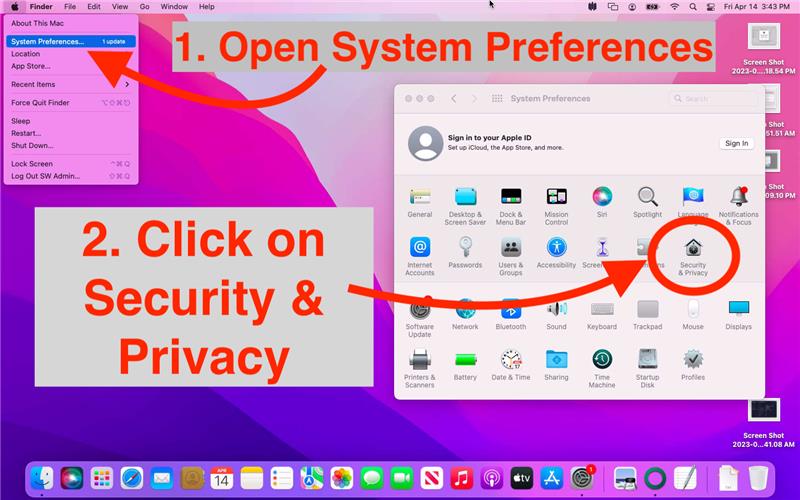
- Go to the Apple menu (top left of screen), and Open “System Settings” (aka System Preferences) then “Security & Privacy” pane.
- Click on the “Privacy” tab at the top of the Security & Privacy pane.
- Scroll down on the left and find “Full Disk Access”. Click on Full Disk Access.
When the Full Disk Access settings open, you’ll likely find the icons “grayed out” because the settings are locked (indicated by the locked padlock on the bottom left). Click the lock in the bottom left to unlock the window, and enter an administrator username and password. If you do not have administrator credentials, you will need to ask your IT support to complete this step on your behalf.
Once you’ve unlocked the preferences, go to the Finder on your Mac. Under the “Go” menu, then choose “Go to Folder…” and copy & paste (or type) this path
/Library/Sentinel/sentinel-agent.bundle/Contents/MacOS/
into the dialog
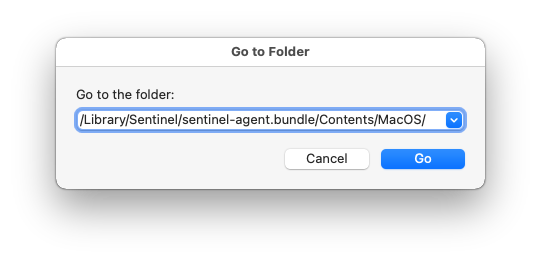
This will open a Finder window where you’ll see several SentinelOne files. Select the “sentineld“, “sentineld_helper” and “sentineld_shell” applications (note the “d” at the end of each of those names).

Drag & drop these three applications to the “Security & Privacy” window you opened previously and click the checkbox on all three.
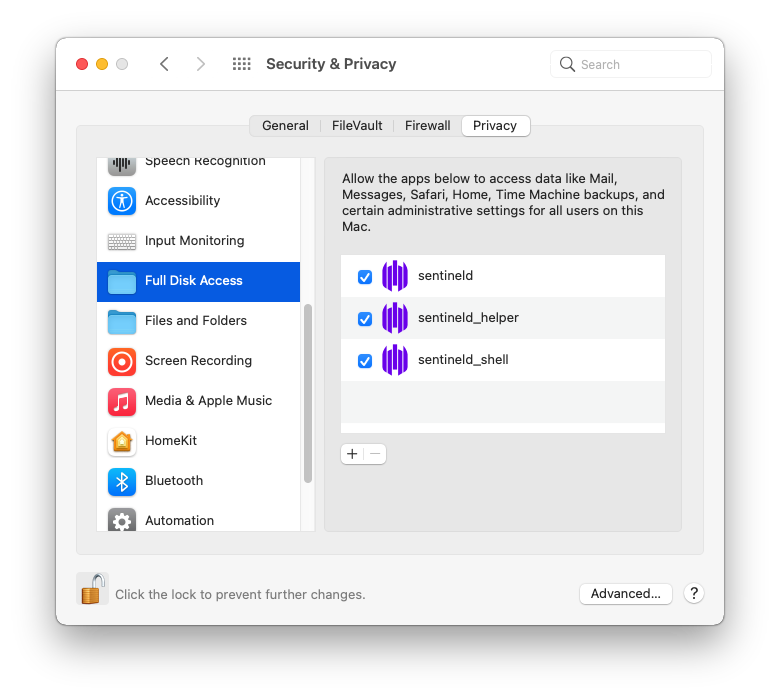
It’s entirely possible that you will need to reboot after Full Disk Access permissions are granted.
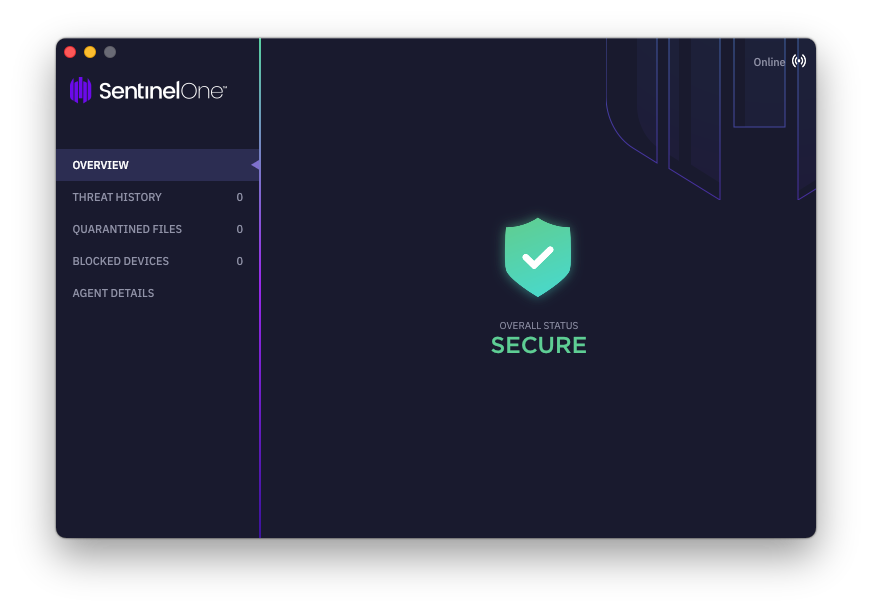
Once done, the icon in the Apple menu bar near the clock will change to this:
![]()
If you click on the icon, you will now see this:
Completing the Installation on macOS 10.14 (Mojave)
If you are using macOS 10.14, we strongly recommend that you upgrade to the most current version of macOS that your hardware supports. SentinelOne is not supported on macOS 10.14 as of June, 2023.
- You may be presented with a message after instllation about the System Extension being blocked. If not, skip to Step 2.
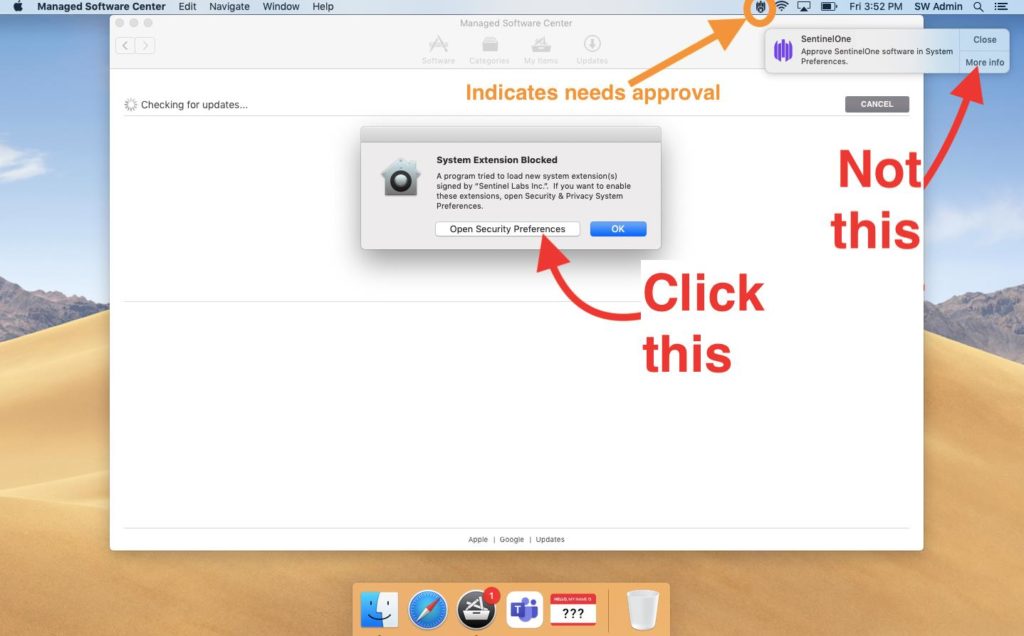
Click “Open Security Preferences” (not “More Info”) - If System Preferences does not open on its own, or you pressed the Ok button… go to the Apple menu (top left) and open System Preferences (aka System Settings), then click on “Security & Privacy” pane.
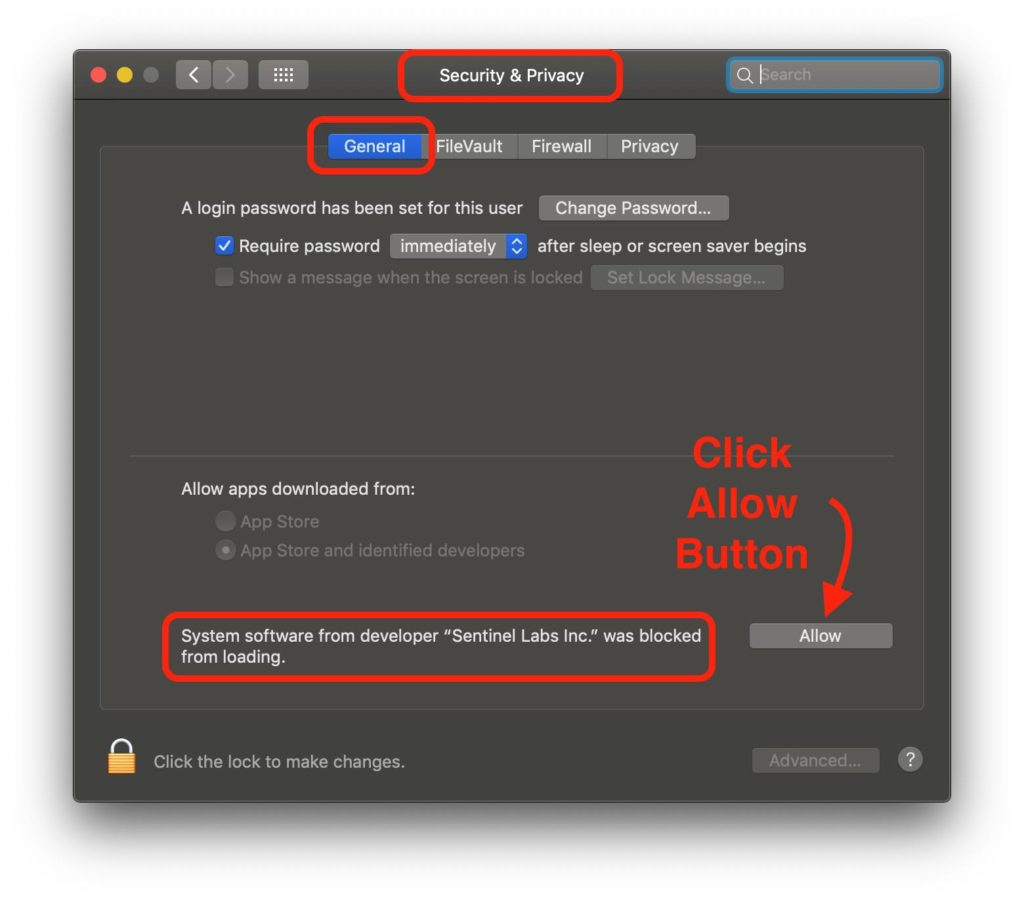
- Then click on the “General” tab if not already selected, and then Click on Allow button…
- Now, look in the menu bar at the top of the screen for the SentinelOne icon
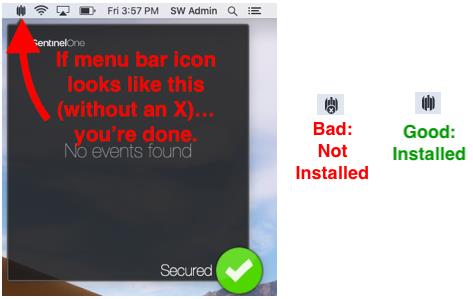
- Once you see the icon without an X, you are done with the installation.
Completing the Installation on macOS 10.13 (High Sierra)
If you are using macOS 10.13, we strongly recommend that you upgrade to the most current version of macOS that your hardware supports. SentinelOne is no longer supported on macOS 10.13.
Before installing the .pkg file, open Terminal and paste this command, replacing “TOKEN_HERE” with your site’s registration token.
echo 'TOKEN_HERE' > /tmp/"com.sentinelone.registration-token"
Then, run the installer. You may need to put the installer in the same /tmp/ directory — but this is unconfirmed.
Once you’ve installed, the package, you’ll likely need to reboot your computer.
Once you restart, you should see the SentinelOne icon in the menu bar solid colored (not gray), and without an “x”. If so, you are installed successfully.
If you still see that it’s not installed, you may need to disable SIP, and manually approve the kext. If you do not know what this means, you should ask for help. Steps are:
- Restart your Mac (again)
- Hold down Command-R to reboot into Recovery Mode.
- Click Utilities.
- Select Terminal.
- Type
csrutil disable
and then approve the kext using this command (the code after “add” is specifically for SentinelOne)
/usr/sbin/spctl kext-consent add 4AYE5J54KN
You can re-enable SIP with this command:
csrutil enable
And then go to the Apple menu and restart. Check that the SentinelOne icon is now solid, and without an X.
Source: https://www.cybervigilance.uk/post/sentinelone-uninstalling-agent
SentinelOne – Uninstalling the Agent
Uninstalling SentinelOne’s agent can be done the secure/easy way from the management console, or the more circuitous route, using the endpoint. In this article, we guide you through the process of removing the agent using both aforementioned techniques on Windows, macOS and Linux.
Online Uninstall directly from the Management Console (All Platforms)
SentinelOne agents can be installed from the SentinelOne Management Console for any platform.
-
Log into your SentinelOne management portal
-
Go to the Sentinels tab
-
Select the machine that you wish to uninstall the software from
-
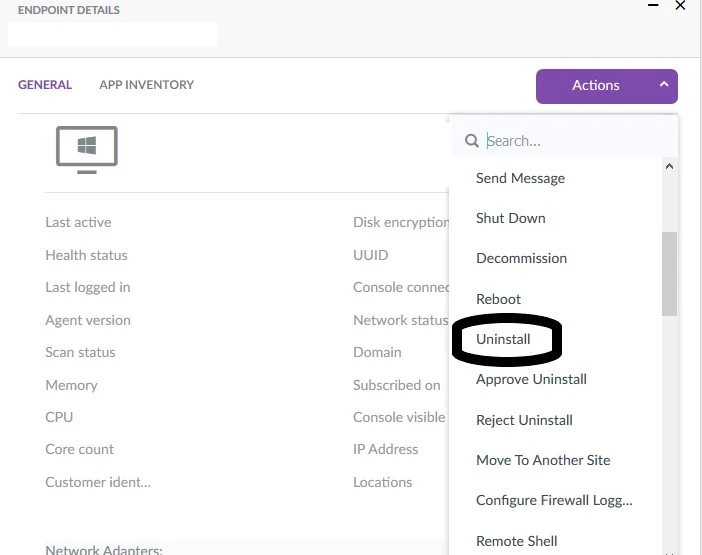
Go to actions and select “Uninstall”
Uninstalling from the endpoint
Note: If you have Anti-Tampering turned on you will need the Passphrase to uninstall from the endpoint.
Accessing the Passphrase.
To acquire the passphrase, go through the following steps.
-
Log into your management portal and find the machine that you wish to uninstall the agent from.
-
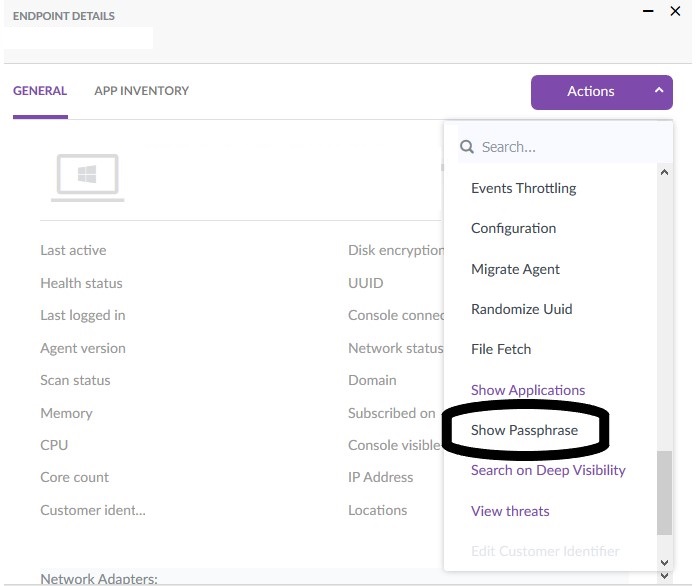
Press on the tab “Actions” and select “Show Passphrase”.
-
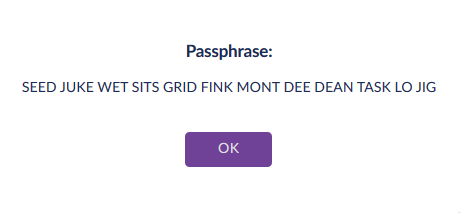
Take a note of this passphrase as it will be needed proceeding to the following steps.
Uninstalling SentinelOne with macOS Recovery Mode
-
During system start, press the Command and R keys (or leave the power button down on M1 Macs) to boot into macOS Recovery Mode.
- Select the language, if prompted, and User > Next > Password (or Options > Continue > User > Next > Password on M1 Macs).
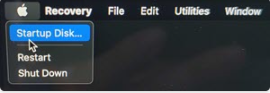
- From the left-hand corner, click the Apple logo > Startup Disk
- Choose the Macintosh HD volume and unlock… > Password.
- Click Startup Disk and select Quit Startup Disk.
- Click Utilities > Terminal to launch the Terminal app within Recovery Mode.

- Uninstall the Agent:
• If the Agent version is 4.4.x or higher, run:

• If the Agent version is 4.3.x or lower, run:

Note: The “Macintosh HD” in the path could include the ” – Data” suffix (e.g., “Macintosh HD – Data”), or even another name if the boot volume has been renamed.
- Restart the computer.
Uninstall SentinelOne from macOS Command Line Using sentinelctl
-
Open Terminal app on your Mac device.
- Then, use these commands to uninstall at the command line
Anti-Tampering off
$ sudo sentinelctl uninstall --local
Anti-Tampering on
$ sudo sentinelctl unprotect --passphrase "passphrase"

===Sentinel protection has been disabled

$ sudo sentinelctl uninstall --local
Note: Uninstalling the agent leaves the endpoint exposed and vulnerable, especially if it’s an unsupported device. It is recommended that the removal of the agent is a last resort solution and methods of securing the endpoint after the agent’s removal are already in place.
Uninstalling SentinelOne from Windows
-
Go to “Add or Remove Programs”
-
Search for SentinelOne
-
Select Uninstall
-
Now if you have Anti-Tamper switched off in the group policy, the uninstalling process is over, but if not, you need to go through a couple of more steps.
-
After you press “Uninstall” you need to make a choice “Online” or “Offline” Verification

-
if you choose “Online” verification, you need to log into the management portal and choose “Approve Uninstall”. This process sends the approval signal from the management console to uninstall the agent.

-
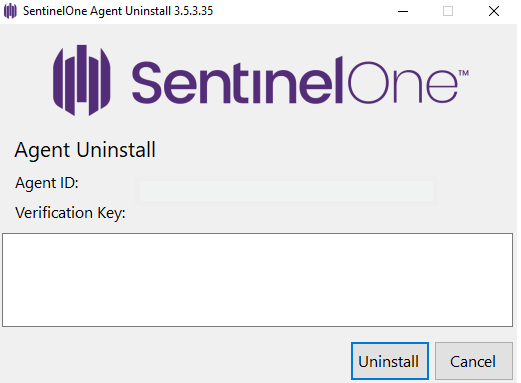
On the other hand, if you choose “Offline”, you need to add the “Verification key”; in other words, the passphrase from the management portal.
-
To acquire the “Passphrase” please follow the steps shown above
Uninstalling SentinelOne from Windows Sentinelctl
Open terminal as admin
Navigate to SentinelOne agent Directory
cd "C:Program FilesSentinelOneSentinel Agent <version>"
Uninstall the agent using the passphrase
uninstall.exe /norestart /q /k="<passphrase>"
Example

Uninstalling SentinelOne from Linux
Uninstalling using Sentinelctl
-
Open terminal on the Linux machine as an admin or a privileged user.
sudo /opt/sentinelone/bin/sentinelctl control uninstall --passphrase "passphrase"
Uninstalling using Linux commands: We recommend that you use these commands only if sentinelctl and reboot did not successfully remove the agent.
-
Ubuntu
service sentineld stop
chkconfig --del sentineld
rm -f /etc/init.d/sentineld
umount /opt/sentinelone/mount
rm -rf /opt/sentinelone
sudo rm /usr/local/sentinelctl
userdel sentinelone
rm /var/lib/dpkg/info/sentinelagent.*
dpkg --purge --force-all sentinelagent
-
Red Hat, CentOS, SuSE, Fedora
service sentineld stop
chkconfig --del sentineld
rm -f /etc/init.d/sentineld
umount /opt/sentinelone/mount
sudo rm /usr/local/sentinelctl
rm -rf /opt/sentinelone
userdel sentinelone
sudo rpm -ev --noscripts SentinelAgent
macOS End of Life Agents
Supported from Management version: Version X SP1
Supported from Agent version: macOS 21.5.x, 5.x. 4.x
-
Due to a security enhancement in the Management Console, macOS Agents from version 21.5 and earlier that were EOL (end of life) in August 2022 or earlier will work only partially with Management Version X SP1, planned for release in the end of August 2023.
Impacted Agents:
-
Agent versions 21.5.x, 5.x. 4.x. This includes all Kext Agents.
-
Agents running on macOS Mojave machines and earlier.
-
-
To do now: We recommend that you upgrade these Agents as soon as possible to a supported version. See the Agent Requirements on macOS, macOS Agent Upgrade Playbook – macOS Ventura, and macOS Agent Upgrade Playbook – EOS/EOL.
Best Practice: For extra caution, for each end of life endpoint that you cannot upgrade now, generate and store the Agent passphrase before your management is upgraded to X SP1.
-
To let you filter for these Agents and upgrade them, from version W SP3, impacted Agents show an Attention Needed Pending Action with this message:
“Attention needed: This Agent version will be deprecated soon. To keep this endpoint protected, please upgrade to a supported agent version.”

To find impacted endpoints, filter for OS – macOS and Pending actions – Attention needed.

-
Expected behavior for impacted Agents with X SP1:
-
Agents will keep the connection to the management and protect the endpoint according to the last applied policy and configuration,
-
Agents will not get any new configuration updates, including Policy, blocklist, exclusions. Firewall rules, Device Control Rules, and more.
-
Some Agent to Management functionality might not work.
-